Microsoft Teams is an amazing Teamwork platform. It integrates almost all office work-related software. Microsoft Planner is one of the software that you can add to a team project. Planner is one of the most important tools. You can plan your team’s day, weeks even months and share it with them via MS Teams.
Microsoft Teams is a chat and collaboration platform provided by office 365. This software integrates all Microsoft tools. Group work is not easy to put together. It is even more challenging to coordinate when the team is using common resources. Microsoft Teams provides a platform where you can connect the team. You can connect the team so well that all the resources that they share go together in one place.
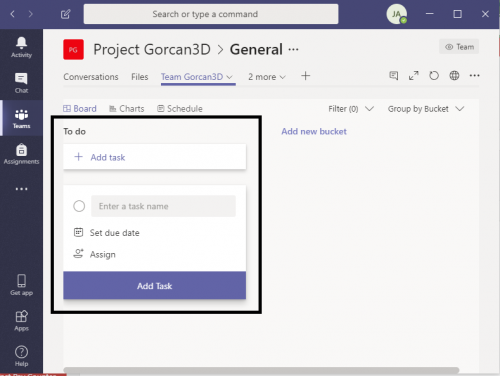
MS Planner is one of the most useful resources that a team can share. The key to an efficient and organized team is a good schedule planner. We will cover MS Planner in Tech-Recipes very soon. For now, follow the following steps to add an MS Planner tab to your project.
How to Add Microsoft Planner Tab in Microsoft Teams Project
Step-by-Step Procedure
1.Go to Microsoft Teams
2.Go to the project that you want to add the planner to.
3.Click on the add “+” symbol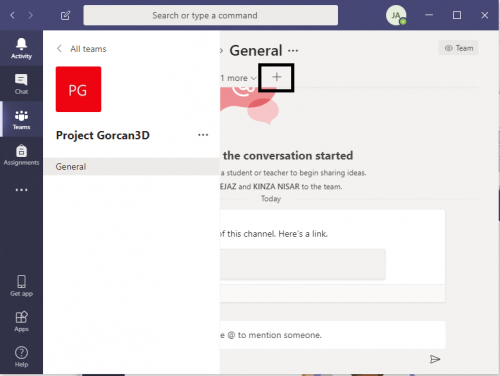
4.Or click on teams and click “…”
5.Click the software that you want to add. i.e. Planner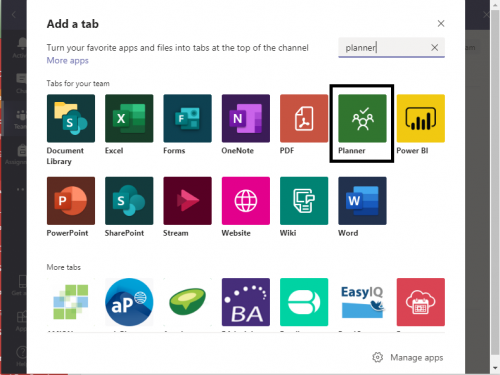
6.Now you can either load from a previous planner or you can make a new one.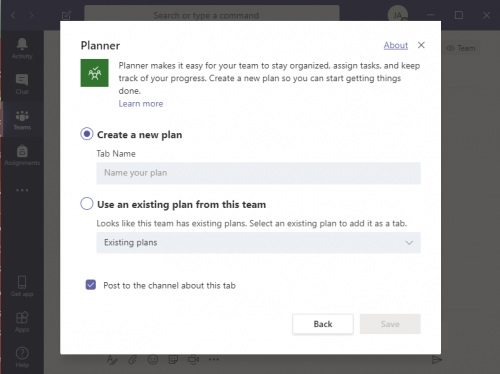
7.And that’s it. You have your tab attached to your project.